Disclaimer * Note Legali

Showing posts with label eotd. Show all posts

Monday, November 10, 2014

Autumn looks: cranberry/burgundy smoky eyes

Cranberry and burgundy are two of those colors that often come back on trend, especially during the fall season when they seem to be matching the nature all around us. 

As beautiful as they are, those colors are not so easy to wear (unless you have dark skin, in which case you can rock them on a daily basis). Here are two looks that will allow you to rock cranberry and burgundy without having to opt for the "gothic doll" look (that is, cranberry eyeshadow paired with a full-on black liner). 

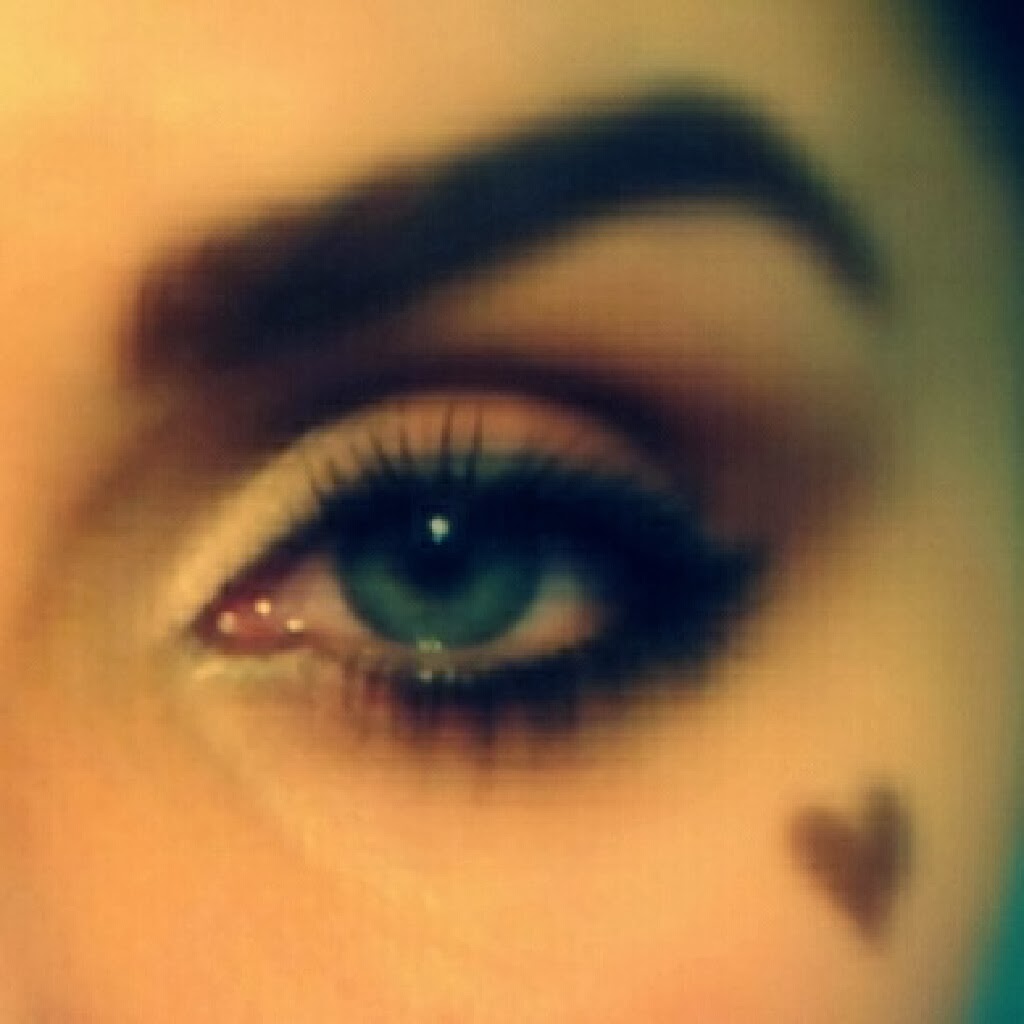
1. Apply a cream burgundy base all over the lid, up to the eye socket - which was Benefit's Creaseless Cream in Stiletto for me;
2. Apply a deep plum matte shade on the outer corner, outer crease - for me, that was MAC's Sketch eyeshadow;
3. Add a a caramel colored eyeshadow to blend those two colors in the crease, and smoke it out towards the browbone. I used Vernau by Illamasqua; 
4. This step is optional, but you can place a motherpearl eyeshadow in the center of the lid to highlight. I used Madreperla by Nabla;
5. The inner corner must be well highlighted, but very light colors can have that goth effect. Try a gold eyeshadow instead. Mine was Nabla's Glitz;
6. Repeat the steps on the lower lashline;
7. Use your plum eyeshadow to line the upper and lower lashline, but stop at one third of the lid. 
8. Apply plenty of mascara.

Try to highlight your browbone with something that is the same color of your skin. You can also use your setting powder if you wish. 
This is a rounded shaped smoky eye. Another tip is try using a golden eye pencil on the inner rim, instead of a black one.

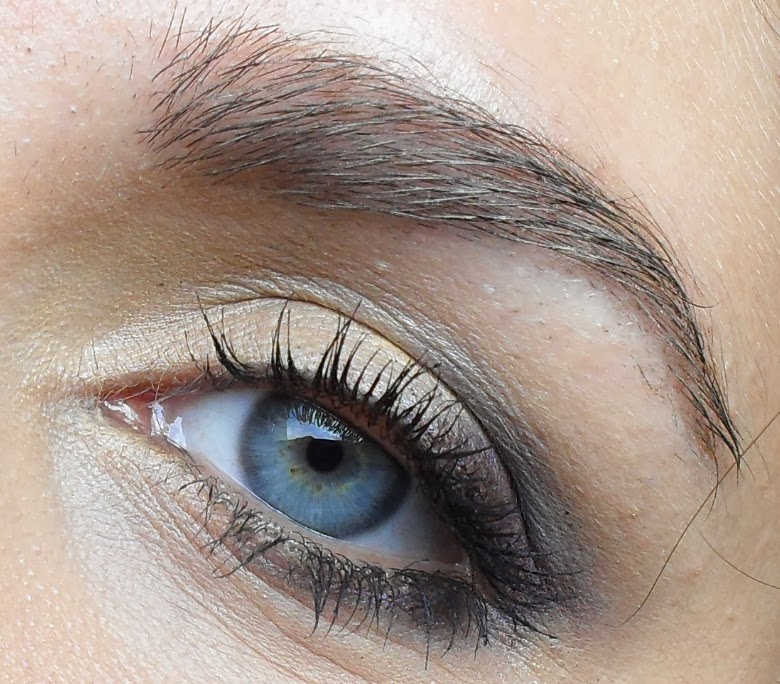
The second look is simpler, and more elongated.


1. Apply your burgundy base - which is once again Benefit's Stiletto here; 
2. Apply MAC's Trax eyeshadow all over the lid. Stop at the socket, and let the burgundy base be the darker color that frames your eyes; 
3. Apply a peachy shade with golden specks to the inner corner. The one I used was Chanel's Abstraction;
4. Coat on your lashes with your black mascara (the one I used wasn't really a great one);
5. Highlight your browbone very lightly, and repeat the color scheme on the lower lashline.

Again, try to use something different than black for your inner rim. 

So, will you give your burgundy and cranberry eyeshadows another go now? 
Which one of these looks is your favorite? 
Are you afraid of the "smoke weed everyday" effect, and what are your strategies to counteract it?


***

Gli ombretti color borgogna e cranberry tornano spesso di moda, soprattutto per la stagione autunnale, quando sembrano andar d'accordo con la natura che cambia intorno a noi. 
Nonostante siano dei colori splendidi, non sempre si portano facilmente. Qui sopra vi ho proposto due smoky eyes che si vi permettano di portare questi colori senza dover optare per il look goth, ossia senza doverli portare per forza con l'eyeliner nero. 

Nel primo ho applicato una base color borgogna (la Creaseless Cream in Stiletto di Benefit) su tutto l'occhio, andando a scurirla un po' nell'angolo esterno con un ombretto color prugna matte (Sketch di MAC). Ho poi applicato un ombretto madreperla per illuminare il centro della palpebra (ma questo step è opzionale, e guardandomi indietro forse anche inutile. Comunque ho usato Madreperla di Nabla). Dopodiché ho usato un color marrone caramello per sfumare il tutto dalla piega in su (io ho usato Vernau di Illamasqua). Per illuminare l'angolo interno ho usato un colore dorato, come Glitz di Nabla, evitando così i colori troppo chiari da bambola goth. Infine ho ripetuto lo stesso schema di colori sotto le ciglia inferiori e usato Sketch a mo' di eyeliner nell'angolo esterno superiore e inferiore dell'occhio. Per illuminare sotto l'arcata sopraccigliare ho invece utilizzato un color carne. Potete anche usare la vostra stessa cipria. 
Vi consiglio di utilizzare una matita dorata all'interno dell'occhio, di mettere tanto mascara e di cercare di dare una forma tonda a questo smoky. 

Il secondo look è invece più facile. La base è sempre la stessa. Sopra ci ho applicato Trax di MAC, facendo attenzione di non portarlo fino alla piega, e mantenendo invece il color borgogna come cornice dell'occhio. Ho poi applicato un ombretto color pesca con brillantini dorati nell'angolo interno (nel mio caso è Abstraction di Chanel), messo tanto mascara (anche se questo non è dei migliori) e poi illuminato sotto l'arcata sopraccigliare con lo stesso procedimento di prima. Questo look è invece un po' più allungato. Anche in questo caso non consiglio di mettere la matita nera

Adesso darete una seconda chance ai vostri ombretti borgogna o cranberry?
Quale di questi due look preferite? 
Avete timore dell'effetto "me faccio 'e canne tutti i giorni" di questi colori e come ovviate al problema?

Tuesday, July 22, 2014

Extravirgin, touched for the very first time


Looks all oily, sorry.


I know the reference to Madonna wasn't fun, but it sounds about right in this case. My first time with Extravirgin eyeshadow by Nabla (review of their eyeshadows coming soon, so stay tuned), and oh my!, it stole my heart. 

Lo so, la citazione di Madonna non è divertente ma è appropriata al caso. La mia prima volta con Extravirgin di Nabla (recensirò presto i loro ombretti) e oh-mio-dio!, mi ha rubato il cuore. 

What I've used for this look: 

FACE

Erborian Ginseng BB cream in Doré
MAC Pro Longwear concealer in NC30
Old Madina gel bronzer
MAC Stereo Rose MSF as a blusher

EYES
Catrice brow gel
Nabla Extravirgin Eyeshadow all over my lid and on the crease
Chanel Illusion d'Ombre in Vision on the inner corner
MAC Vanilla pigment on the very inner corner
Illamasqua Vernau above the crease
Illamasqua Sophie pencil to tightline
Essence mascara

On my lips, I was wearing a sheer coral gloss by Jemma Kidd, but these pictures were taken after I had a beer. 

Sulle labbra avevo un gloss semi-trasparente color corallo di Jemma Kidd, ma chiaramente ho fatto le foto dopo aver bevuto una birra. 


Spero vi sia piaciuto, fatemi sapere cosa pensate di Extravirgin (chiaramente qui il colore non si vede benissimo, ma lo vedrete nella recensione), e degli ombretti Nabla in generale. E del look, perché no?!


Thursday, March 27, 2014

FOTD Mac Sketch & Trax


Essence eyeshadow primer
Mac Powersurge eyeliner as a base
MAC Trax over Powersurge
MAC Sketch in the outer corner and lowerlashline
Illamasqua Vernau in the crease
Illamasqua Stealth in the inner corner and brow bone
MAC Brow Set in Beguille

Tuesday, March 25, 2014

FOTD Mac Humid eyeshadow

Please, excuse the cellphone quality pictures: they were taken fast before going out, and at my brother's. We all know what it is like to try and take pictures for our blogs when men are around.

Scusate per la qualità delle foto fatte col cellulare: son state fatte di fretta prima di uscire e a casa di mio fratello. Sappiamo tutte com'è cercare di far foto per i blog quando ci sono gli uomini.


EYES:

MAC Humid inner and outer corner, and lower lashline
MAC Patina in the middle of the lid
MAC Folie in the crease
MAC Vanilla pigment inner corner and brow bone
MAC Powersurge eye pencil on the lower rim
MAC Brow set in Beguille
Bourjois Fan-tastic mascara


Friday, November 15, 2013

Ellis Faas Look #2 purple smokey eyes

 This is the look I wore to my friend's birthday party last night. I know, cellphone pictures...but I was in a rush (you know, work, zumba practice that makes you soak in sweat, getting ready and all that jazz). 
This was a super charged purple smokey eyes look, with an super beautiful bronze/gold inner corner. Again, I have used Ellis Faas eyeshadows for this, and I have charged the lower lashline a lot because of my eye shape. If I don't do this, my hooded eyelids becomes droopy, so yay for a charged lower lashline. 


Ecco il trucco che ho fatto ieri per la festa di compleanno della mia amica. Lo so, foto del cellulare, ma ero tanto di fretta (sapete...il lavoro, la zumba che ti fa sembrare un secchio di sudore ambulante, prepararsi ecc. ecc.). 
E' uno smokey viola molto carico, con l'angolo interno illuminato da un bel bronzo/oro. Anche per questo look ho usato gli ombretti Ellis Faas ed ho caricato molto la rima inferiore a causa della forma del mio occhio. Se voglio portare uno smokey sono praticamente obbligata, altrimenti da incavati, i miei occhi appaiono all'ingiù - anche se non lo sono. 


PRODUCTS USED

Ellis Faas E114 - Bordeaux Red
Ellis Faas E303 - Bronze
MAC Trax (transitioning from the bronze to the purple // transizione tra il bronzo e il viola) 
Illamasqua Vernau (above the crease, softening the blend // poco sopra la piega, per sfumare)
MAC Honey Lust + Illamasqua Stealth (brow bone)
Soap & Glory Archery eyebrow marker & pencil
Bourjois Volume Glamour Max mascara

Hope you enjoyed it. Have a nice weekend

Spero vi sia piaciuto. Buon weekend.

Thursday, November 14, 2013

Ellis Faas Look #1

If you follow me from quite some time now, you know I love Ellis Faas. Her imagery is pure art, her products are simply beautiful. The whole concept, I find beautiful. I've been using Ellis Faas eyeshadows and lipsticks for years, and I've always said that despite the proposterous price, I'll buy her lipsticks again in the future. 
Yeah, right: her lipsticks. Not the eyeshadows, I hear you say? No. Not unless they change the packaging. The product itself is awesome. Seriously, it is the best cream eyeshadow I've ever tried in my whole life. But, damn it, the stuff costs 26 € and the mechanism on the bullet is hell. It takes ages before it comes out of the tube, and most of the times, if you don't use the eyeshadows everyday, the product dries in the hole and obstructs it. When you screw the mechanism, the pressure is so much, the whole brush falls apart from the rest of the bullet. What the heck! You never manage to put it back properly, and the product inside just dries. For 26 freaking euros, I want more. I'd say the packaging is not appropriate to the content there, because I have never had the same problem with the lipsticks, and I'm sure as hell that doesn't happen with their foundation or concealer. 

Anyway, I've recently decided to do my eyes make-up only with Ellis Faas products, so that I don't put them to waste, so expect more of these soon. You will see, the product itself is amazing, and I love it. So, this is the first look. 
Enjoy. 


Se mi seguite da un po' di tempo, sapete già che adoro Ellis Faas. Le immagini promozionali sono semplicemente belle. Il concetto della marca mi piace. Uso gli ombretti e i rossetti Ellis Faas da un po' di anni, e nonostante i prezzi improponibili, ricomprerò sicuramente i rossetti in futuro (tipo auto-regalo natalizio ogni anno quando avrò un lavoro decente)
Sì, i rossetti. Non gli ombretti, vi sento già dire? No. Non prima che abbiano cambiato il pack. Vedete, il prodotto in sé è fantastico. Davvero, è il miglior tipo di ombretto in crema che abbia mai provato. Ma, cribbio, costa 26 € e il meccanismo è infernale. Ci vogliono due ore prima che esca fuori il prodotto...ogni volta che lo uso. La maggior parte delle volte, se l'ombretto non viene usato ogni giorno, il prodotto si secca nel buchino e lo ostruisce. Poi quando si va ad avvitare il meccanismo, la pressione è così tanta che la parte dove c'è il pennello salta via. E che cavolo! Non si riesce manco a rimetterlo a posto per bene, e quindi il resto del prodotto si secca. Per 26 astronomici euoro, pretendo di più. Direi che stavolta il packaging non va bene con il prodotto, perché lo stesso problema io non l'ho mai avuto coi rossetti, e sono sicura al 100% che non accada coi fondotinta e i correttori.

Comunque, di recente mi sono imposta di truccarmi gli occhi solo con i prodotti Ellis Faas, in modo da non sprecarli, quindi aspettatevi numerosi post come questo. Vedrete, il prodotto in sé è davvero fantastico, io lo adoro. 
Dunque, questo è il primo look. Spero vi piaccia.

Sorry, I'm letting my eyebrows grow and I wear no foundation // Scusatemi, ma sto facendo ricrescere le sopracciglia e non porto fondotinta qui


PRODUCTS USED

ELLIS FAAS Creamy Eyes E119 Yellow Ochre 
ELLIS FAAS Creamy Eyes E203 (discontinued)
ELLIS FAAS Creamy Eyes E114 Bordeaux Red (it is more of a deep purple)
Bourjois Volume Glamour Max Mascara
MAC Brow Gel in Beguille

No brushes// non ho usato nessun pennello


Have you ever tried Ellis Faas products? 
What do you think of the bullets?

Avete mai provato i prodotti Ellis Faas? 
Cosa ne pensate delle loro confezioni?

Wednesday, October 16, 2013

Glossy blue smokey eyes: a make-up experiment

Those of you who have been following me on Instagram for quite a while may have already seen some of these pictures. 
One night I was bored, but inspired and I had fun trying out glossy smokey eyes on my friend and former flatmate (although I speak American English, I've always hated calling people who do not share a room with me, my roommates). The result is what follows: 


Chi mi segue su Instagram da tempo avrà certamente già visto queste foto. 
In breve, una notte mi annoiavo, ma mi sentivo piuttosto ispirata e ho deciso di provare a fare uno smokey blu e glossy sulla mia amica ed ex-coinquilina. Il risultato è questo: 


Of course, this is not for everyone. On me, having a hooded eyelid, this just creases and it resembles nothing. But on Giulia's gorgeous, rounded and spacious eyelids, it absolutely rocks!
The technique is really simple: a creamy waterproof base, an eyeshadow of the same color, a warm brown eyeshadow to blend in the crease, a teeny-tiny bit of clear lipbalm, and a bit of clear gloss on top.


Chiaramente non è per tutti. Su di me non si vede un picchio e fa le pieghe, ma sugli occhi bellissimi, tondi e spaziosi di Giulia, è un look fantastico!
La tecnica è davvero semplice: base waterproof in crema, un ombretto in polvere dello stesso colore, un ombretto marrone caldo nella piega con la palpebra fissa, pochissimo burrocacao trasparente, un tocco di gloss trasparente, ed è fatta. 


Have you ever tried this technique? Do you like it? 

Avete mai provato questa tecnica? Vi piace? 

Wednesday, October 9, 2013

Oldies but goldies

Just a random quick post with a collection of old looks that I found on my cellphone's gallery.

Un post rapido e un po' casuale con una collezione di vecchi look trovati sulla galleria del mio cellulare.


Macro is a bitch! - Shaka Full Color Lipgloss = love

St. Valentine's for Long Distance Lovers = nostalgia // Brown eye pencil heavily smudged along the lash line

Key features: MAC Patina & Satin Taupe; Illamasqua Obsidian and Stealth

Same look; Key Features: Bourjois 1 2 3 Perfect foundation, Diego Dalla Palma Mascarone mascara


Key Features: MAC Patina; some other bronze shadow, Illamasqua Vernau; MAC eyebrow gel (magic)

Key features: L'Occitane BB cream; Shaka Full Color Lipgloss, Illamasqua Shimmer Blush in Ambition

Key Features: Erborian BB cream; MAC Media lipstick dabbed and smudged; Bourjois Volume Glamour Max mascara

Key features: MAC Studio Sculpt foudandation; Illamasqua Precision Liner in Alchemy (gold, inner corner); MAC eyebrow pencil+gel; La Roche-Posay Novalip Duo lipstick.

Monday, September 24, 2012

Random FOTDs

Key piece for the fall: purple lipgloss.

(This was actually from this summer) Key piece: bronze eyes, glowing skin


Key piece: natural warm make-up, defined eyebrows
Hope you enjoyed these (I will be back to posting with my regual camera soon) 
make sure you follow me on Instagram (aliceinaneonwonderland) 
and Twitter (aliceinwond348) 

22.09.12 Face of the night in Instagrammed Pictures

That's me and my roommate, ready to go out


You were supposed to see the golden glitter in the inner corner there


That's some random picture I have only uploaded for you to see the eyes&lips combo and a little bit more of the make-up


FACE: Illamasqua Cream Foundation in 233; Illamasqua Cream Pigment in Emerge + Pupa Luminys Touch in 03; Illamasqua Shimmer Blusher in Morale; Madina Milano Photoconcealer // EYES: Ellis Faas Lights E303 as a base; Clinique Color Surge e/s in Strike it Rich; MAC Crushed Pigment in Rushmetal; Urban Decay e/s in Half Baked (inner corner); Sephora golden glitter over Too Faced Shadow Insurance Glitter Glue; Soap & Glory Kohl Liner in Black; KIKO Luxurious Lashes mascara// LIPS: Madina Milano Lip Pencil (can't remember the number, but it's pink); Clarins Rouge Prodige Lipstick in Miami Pink (it's a brighter, cooler toned color, perfect for clubbing)

Follow me on Instagram: aliceinaneonwonderland

Sunday, June 10, 2012

Boho chic FOTD

 PRODUCTS USED:
 Face:
- Madina Milano Absolutely Ageless Foundation in 834
- KIKO Essential Bronzer (from an old collection, but you can find more or less the same product in their current summer collection) in 03 Sand Mélange
- Illamasqua Shimmer Blusher in Morale
- Cargo One Base as under-eye concealer
Eyes: 
- Bobbi Brown Gray Denim (brownish gray) e/s for the brows
- Diego Della Palma brow gel
- Madina Milano Eye Pencil in 04 (auburn-ish brown) 
- Illamasqua Powder Eyeshadow in Vernau on the crease
- Jane Iredale Pure Pressed eyeshadow in Ecru under the eyes (matte beige)
- Madina Milano Nutrilash Mascara
- Madina Milano PrismaStar in 003 Space Oddity (inner corner)
Lips:
Isadora Perfect Moisture Lips in 149 Flirty Fuchsia

(Just when you think you've done a very simple make up in 10 minute max., you realize that you used a ton of products. Mhm, makes me think of how many we used for "complicated" make-up looks)
Flirty boho chic cream-colored dress: OVS Industry (found on sale for 10 euros, reduced from 50! yay!) 
Brown shrug: Pimkie
Earrings: Pimkie

Hairstyle: natural loose curls on the front, messy curly bun at the bottom.


What's your favorite style for the summer? 
Will you be going for the bohemian chic look in all its variations?


*Pictures were instagrammed, therefore all colors appear less bright and slightly lighter than the reality.

Friday, January 7, 2011

EOTD: Pixi Natural Mineral Kit in Santa Barbara


(all of these pictures were taken at 10 pm so the make-up wasn't really fresh - and as usual colors were more vivid in real life)

PRODUCTS USED

Pixi Natural Mineral Kit in 01 Santa Barbara - all of the eyeshadows
Collection 2000 Fast Stroke Liquid Eyeliner - used with a BDellium Tools 710 brush (FANTASTIC FOR LIQUID EYELINER!!)
Ellis Faas Mascara

Wednesday, December 23, 2009

ooh yes, I made it!

I have finally managed to put on false lashes! I cut them into halves, to be honest. I needed to start somewhere with my practice, didn't I?

I also perfectioned the green and brown smokey eye inspired by the Urban Decay look-book on my BOS vol II palette. And with proper lighting and camera, it does look a lot better.


these lashes are from e.l.f. (www.eyeslipsface.co.uk) and only cost me £ 1,50.
Sounds barganeous, especially if you're a beginner with false lashes. Last year I spent € 7 on some Ardel falsies, couldn't get the hang of them, and ended up wasting them.

The only downside is that the little glue in the package does not even open, so you'll have to have your own glue.


Products used:
UDPP
UD Misdemeanor e/s all over the lid and on the lower lashline
UD Homegrown e/s on the inner corner, and blended onto Misdemeanor on the upperlashline and outer corner
UD Twice Baked e/s on the crease
UD 24/7 glide-on pencil in zero on the upper and lower waterlines, and then smudged into Misdemeanor on the lower lashline
e.l.f. dramatic false lashes (outer half of the eye)
two coats of Rimmel Sexy Curves mascara in Intense Black
e.l.f. brow kit to fill in my eyebrows.


DISCLAIMER: all of the afore-mentioned products were paid for. I do not represent or work for any of the company named in the post.