Disclaimer * Note Legali

Showing posts with label mac. Show all posts

Friday, September 18, 2015

Recap du jour || a few looks using the MAC Cosmetics Warm Neutral Palette

The MAC Cosmetics Eyeshadow x 15 palettes are probably MAC's unsung heroes. With a warm and a cool version, these palettes have never gotten much hype around blogs or Youtube videos. 
Now, at 118 €, I'm sure there are not so many mentally ill people who give in as I did - but I still think this is better than any limited edition purchase (too many limited editions, MAC, just too many!). Why? Well, here's a recap of some of the smokiest looks I've created using my Warm Neutrals palette: 


If you are still on the fence about buying this palette, just know that a review will be coming shortly. 

I'm sorry if I'm a very bad blogger, but work, social life, and guitar + singing classes get in the way, and blogging takes so much time, I can't do everything. 

Just follow me on Facebook and Instagram for updates. 

Kisses, 

L.

Thursday, April 23, 2015

Sardinian Sunset || look du jour

 It was a sunny day in the east of France, so I wanted something warm to decorate my face. I looked at my palettes, and some colors reminded me of the warmth of my homeland's sunsets. I could not pass along the opportunity to honor my roots. This make-up will look incredibly good on tanned skin. This make-up will look incredibly good in Sardinia. 

E' stata una bella giornata di sole nell'est della Francia, perciò volevo qualcosa di caldo per decorare il mio viso. Ho dato un'occhiata alle mie palette, alcuni dei colori mi hanno ricordato il calore dei tramonti della mia terra. Non potevo farmi sfuggire l'occasione di onorare le mie radici. Questo trucco sarà benissimo sulla pelle abbronzata. Questo look sarà bellissimo in Sardegna.


PRODUCTS USED

EYES 

MAC Paint Pot in Soft Ochre
Nabla e/s in Petra (crease), Grenadine (outer V, outer lower lashline), Glitz (all over the lid and lower lashline), 
Nars e/s in Mekong as a liner
Madina Prisma Shine e/s in Glow (I think, I can't remember its name) brow bone
Gosh eyebrow kit 
Benefit Gimme Brows brow gel
L'Oréal Miss Manga mascara


FACE

Madina Perfect Fit Foundation
MUFE HD Powder
Nars Laguna Bronzer
MAC Stereo Rose MSF as a blush

LIPS 

Bio Beauté by Nuxe raspberry lipbalm


A little outfit of the day - Dress by Naf Naf


Hope you like it - what does sunset in your country look like? Let's start a tag to make them into make-up looks! 

Spero vi piaccia - e il tramonto da voi che colori ha? Iniziamo un tag e facciamo diventare il vostro tramonto un trucco!

blues and greens || look du jour

 PRODUCTS USED

EYES

MAC Paint Pot in Soft Ochre
Nabla e/s in Eternity (outer V and lower lashline), Aurum (transition with green), Zoe (inner corner), Petra & Caramel (crease transition), Antique White (brow bone). 
MAC e/s in Humid (first portion of the lid and lower lashline)
L'Oréal Miss Manga mascara 
Benefit Gimme Brows brow gel 
Soap&Glory black pencil to tightline


FACE
 
Madina Perfect Fit foundation
Nars Laguna bronzer as contour
Nars Orgasm blush
MUFE HD powder

LIPS

Bourjois Velvet Mat in Peach Club
MAC Shanghai Spice lipstick


Monday, November 10, 2014

Autumn looks: cranberry/burgundy smoky eyes

Cranberry and burgundy are two of those colors that often come back on trend, especially during the fall season when they seem to be matching the nature all around us. 

As beautiful as they are, those colors are not so easy to wear (unless you have dark skin, in which case you can rock them on a daily basis). Here are two looks that will allow you to rock cranberry and burgundy without having to opt for the "gothic doll" look (that is, cranberry eyeshadow paired with a full-on black liner). 

1. Apply a cream burgundy base all over the lid, up to the eye socket - which was Benefit's Creaseless Cream in Stiletto for me;
2. Apply a deep plum matte shade on the outer corner, outer crease - for me, that was MAC's Sketch eyeshadow;
3. Add a a caramel colored eyeshadow to blend those two colors in the crease, and smoke it out towards the browbone. I used Vernau by Illamasqua; 
4. This step is optional, but you can place a motherpearl eyeshadow in the center of the lid to highlight. I used Madreperla by Nabla;
5. The inner corner must be well highlighted, but very light colors can have that goth effect. Try a gold eyeshadow instead. Mine was Nabla's Glitz;
6. Repeat the steps on the lower lashline;
7. Use your plum eyeshadow to line the upper and lower lashline, but stop at one third of the lid. 
8. Apply plenty of mascara.

Try to highlight your browbone with something that is the same color of your skin. You can also use your setting powder if you wish. 
This is a rounded shaped smoky eye. Another tip is try using a golden eye pencil on the inner rim, instead of a black one.

The second look is simpler, and more elongated.


1. Apply your burgundy base - which is once again Benefit's Stiletto here; 
2. Apply MAC's Trax eyeshadow all over the lid. Stop at the socket, and let the burgundy base be the darker color that frames your eyes; 
3. Apply a peachy shade with golden specks to the inner corner. The one I used was Chanel's Abstraction;
4. Coat on your lashes with your black mascara (the one I used wasn't really a great one);
5. Highlight your browbone very lightly, and repeat the color scheme on the lower lashline.

Again, try to use something different than black for your inner rim. 

So, will you give your burgundy and cranberry eyeshadows another go now? 
Which one of these looks is your favorite? 
Are you afraid of the "smoke weed everyday" effect, and what are your strategies to counteract it?


***

Gli ombretti color borgogna e cranberry tornano spesso di moda, soprattutto per la stagione autunnale, quando sembrano andar d'accordo con la natura che cambia intorno a noi. 
Nonostante siano dei colori splendidi, non sempre si portano facilmente. Qui sopra vi ho proposto due smoky eyes che si vi permettano di portare questi colori senza dover optare per il look goth, ossia senza doverli portare per forza con l'eyeliner nero. 

Nel primo ho applicato una base color borgogna (la Creaseless Cream in Stiletto di Benefit) su tutto l'occhio, andando a scurirla un po' nell'angolo esterno con un ombretto color prugna matte (Sketch di MAC). Ho poi applicato un ombretto madreperla per illuminare il centro della palpebra (ma questo step è opzionale, e guardandomi indietro forse anche inutile. Comunque ho usato Madreperla di Nabla). Dopodiché ho usato un color marrone caramello per sfumare il tutto dalla piega in su (io ho usato Vernau di Illamasqua). Per illuminare l'angolo interno ho usato un colore dorato, come Glitz di Nabla, evitando così i colori troppo chiari da bambola goth. Infine ho ripetuto lo stesso schema di colori sotto le ciglia inferiori e usato Sketch a mo' di eyeliner nell'angolo esterno superiore e inferiore dell'occhio. Per illuminare sotto l'arcata sopraccigliare ho invece utilizzato un color carne. Potete anche usare la vostra stessa cipria. 
Vi consiglio di utilizzare una matita dorata all'interno dell'occhio, di mettere tanto mascara e di cercare di dare una forma tonda a questo smoky. 

Il secondo look è invece più facile. La base è sempre la stessa. Sopra ci ho applicato Trax di MAC, facendo attenzione di non portarlo fino alla piega, e mantenendo invece il color borgogna come cornice dell'occhio. Ho poi applicato un ombretto color pesca con brillantini dorati nell'angolo interno (nel mio caso è Abstraction di Chanel), messo tanto mascara (anche se questo non è dei migliori) e poi illuminato sotto l'arcata sopraccigliare con lo stesso procedimento di prima. Questo look è invece un po' più allungato. Anche in questo caso non consiglio di mettere la matita nera

Adesso darete una seconda chance ai vostri ombretti borgogna o cranberry?
Quale di questi due look preferite? 
Avete timore dell'effetto "me faccio 'e canne tutti i giorni" di questi colori e come ovviate al problema?

Tuesday, July 22, 2014

Extravirgin, touched for the very first time


Looks all oily, sorry.


I know the reference to Madonna wasn't fun, but it sounds about right in this case. My first time with Extravirgin eyeshadow by Nabla (review of their eyeshadows coming soon, so stay tuned), and oh my!, it stole my heart. 

Lo so, la citazione di Madonna non è divertente ma è appropriata al caso. La mia prima volta con Extravirgin di Nabla (recensirò presto i loro ombretti) e oh-mio-dio!, mi ha rubato il cuore. 

What I've used for this look: 

FACE

Erborian Ginseng BB cream in Doré
MAC Pro Longwear concealer in NC30
Old Madina gel bronzer
MAC Stereo Rose MSF as a blusher

EYES
Catrice brow gel
Nabla Extravirgin Eyeshadow all over my lid and on the crease
Chanel Illusion d'Ombre in Vision on the inner corner
MAC Vanilla pigment on the very inner corner
Illamasqua Vernau above the crease
Illamasqua Sophie pencil to tightline
Essence mascara

On my lips, I was wearing a sheer coral gloss by Jemma Kidd, but these pictures were taken after I had a beer. 

Sulle labbra avevo un gloss semi-trasparente color corallo di Jemma Kidd, ma chiaramente ho fatto le foto dopo aver bevuto una birra. 


Spero vi sia piaciuto, fatemi sapere cosa pensate di Extravirgin (chiaramente qui il colore non si vede benissimo, ma lo vedrete nella recensione), e degli ombretti Nabla in generale. E del look, perché no?!


Friday, July 11, 2014

FOTD Humid by Mac

I think you know that by now, but I am useless when it comes to photography. 
None of these pictures do justice to what Humid really is, or the make-up I wore for that matter. 
Nevertheless, I can't keep being a bad blogger, so when you look at the pictures, just imagine that Humid is more vivid green, kind of like the one from a glass bottle. Enjoy anyway.

Penso che ormai lo sappiate, sono un'inetta quando si tratta di fotografia.
Nessuna di queste foto renderà giustizia alla bellezza di Humid o del trucco che portavo, se è per quello. 
Tuttavia, non me la sentivo di continuare a fare la cattiva blogger, perciò ricordatevi solo che quando guardate queste foto, dovete immaginare Humid come molto più vivido, tipo un bel verde bottiglia.


VISO/FACE
Vichy Dermablend foundation
Nars Laguna bronzer
Nars Orgasm Blush
Illamasqua Powdered Metal in Ether

OCCHI/EYES
Mac Humid e/s
Estee Lauder mat brown eyeshadow
Nars Laguna bronzer
Illamasqua Powdered Metal in Ether as a highlighter
Catrice brow gel 
Essence Lashes Go Wild mascara

LABBRA/LIPS
Lancome Juicy Tube in Mango

**For reference, this is how Humid actually looks like**

Thursday, March 27, 2014

FOTD Mac Sketch & Trax


Essence eyeshadow primer
Mac Powersurge eyeliner as a base
MAC Trax over Powersurge
MAC Sketch in the outer corner and lowerlashline
Illamasqua Vernau in the crease
Illamasqua Stealth in the inner corner and brow bone
MAC Brow Set in Beguille

Tuesday, March 25, 2014

FOTD Mac Humid eyeshadow

Please, excuse the cellphone quality pictures: they were taken fast before going out, and at my brother's. We all know what it is like to try and take pictures for our blogs when men are around.

Scusate per la qualità delle foto fatte col cellulare: son state fatte di fretta prima di uscire e a casa di mio fratello. Sappiamo tutte com'è cercare di far foto per i blog quando ci sono gli uomini.


EYES:

MAC Humid inner and outer corner, and lower lashline
MAC Patina in the middle of the lid
MAC Folie in the crease
MAC Vanilla pigment inner corner and brow bone
MAC Powersurge eye pencil on the lower rim
MAC Brow set in Beguille
Bourjois Fan-tastic mascara


Wednesday, March 19, 2014

Review: MAC Pro Longwear Concealer

Being the girl with super high cheek bones that I am, I always have a problem with fine lines under my eyes, hence with under-eye concealers. 
That little problem is called fine lines. Yes, I want to blame that problem to my facial bones structure rather than to the fact that I turned 30 this year, but I think it is the truth - given that I've had the same problem in ages, and I had always had a love/hate relationship with concealers before I met MAC Pro Longwear. See, I need to conceal those dark circles that glasses adorn my eyes with, but everything I had tried before this particular concealer - no matter how good and long-lasting it was - has always left me looking like Mr. De Martino from Daria in 4 or 5 hours tops.

Remember him? The series was hilarious.
Last year, I gave in and bought the famous MAC Pro Longwear concealer (my shade is NC30) and I have never used anything else ever since.
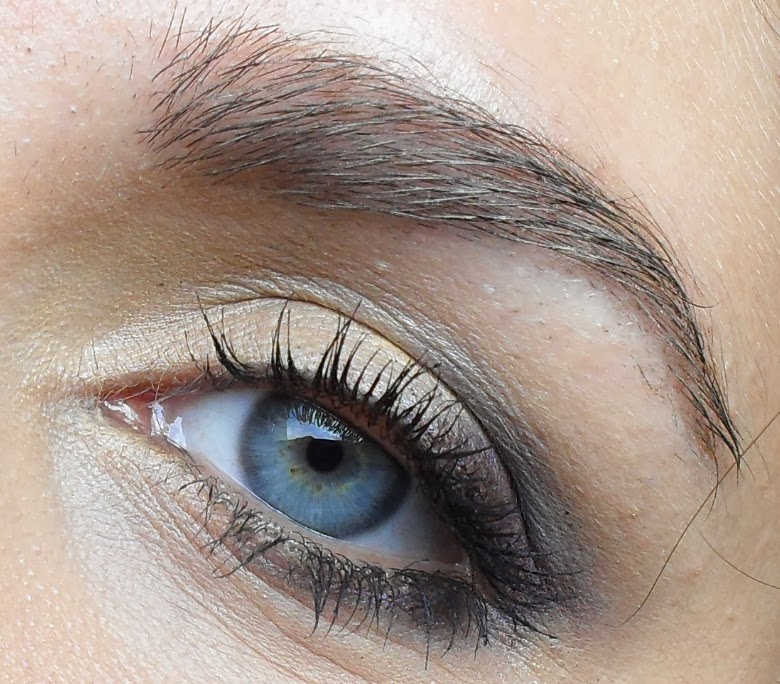
This concealer covers darks circles, discolorations, spots (and it is a liquid concealer so it does not cake up on big spots) with a longwearing and flawless finish. I would also say it looks as natural as it gets for a high-coverage concealer.
It lasts at least 12 hours and does not fill into your fine lines at all. It is an awesome time, and I had never come across something like this before.
It is very easy to apply and blend, although it is a bit drying so if you have dry skin already, try and put some highlighting concealer thing-y over it. 
My only gripe with this fantastic product is its packaging: it comes in a glass tube (Nay! Not good for the clumpsy-handed gals!) with an evil pump. The damn thing is so hard you push it too much and it goes out of control, dispensing way too much product (enough to cover your whole face!). Considering that you really need a teeny-tiny bit of product to cover your circles, this is hell. 

Apart from this detail that I hope MAC will take into consideration (I am not the only one who complains about it), I love this concealer and I will not use anything else anymore. In the picture below, you see how much is left after over 1 year of religious usage, so it definitely is worth the splurge!

MAC Pro Longwear Concealer retails for € 18.50 (in France - mind you, prices vary depending on the country) on MAC counters or your country's MAC cosmetics website.
[For reference, a concealer from L'Oréal costs around € 11, so put two and two together...]


Da ragazza con gli zigomi alti quale sono, ho da sempre il problema delle rughette di espressione sotto gli occhi, e di conseguenza ho problemi anche a trovare il giusto correttore copriocchiaie. 
Chiaramente voglio attribuire questo problema alla struttura del mio viso, e non al fatto che quest'anno abbia compiuto 30 anni (inserisci qui lacrimucce varie). Penso, però, che sia la verità visto che questo problema l'ho da sempre e da sempre ho una relazione di amore e odio con i correttori. Questo prima di incontrare il MAC Pro Longwear. In effetti ho bisogno di coprire le occhiaie con le quali i miei occhiali da vista adornano i miei occhietti, ma tutti i prodotti che ho provato prima di questo particolare correttore, non importa quanto buoni o duraturi fossero, mi facevano sembrare il Prof. De Martino di Daria (lo trovate nella prima foto, ve lo ricordate?) in 4 o 5 ore massimo. 

L'anno scorso ho ceduto ed ho comprato il famoso correttore MAC Pro Longwear (il mio colore è NC30) e da allora non ho più usato nient'altro. 
Questo correttore copre le occhiaie, discromie varie e brufoli (e visto che è liquido non fa pastoni sui brufoloni cistosi e dell'acne), dura tantissimo e ha un finish perfetto. Direi anche che è quanto di più naturale si possa ottenere con un correttore così coprente. 
Dura almeno 12 ore e non si infila per niente nelle rughette e nelle linee di espressione. E' davvero tantissimo e non avevo mai trovato niente di simile prima d'ora. 
Si applica e si sfuma molto bene, anche se secca un po' perciò se avete la pelle già secca, provate a mettere uno di quei correttori illuminanti sopra. 
L'unico rimprovero che faccio a questo prodotto fantastico è la confezione, che si presenta come una boccetta di plastica (non adatta alle persone maldestre) con un erogatore a dir poco demoniaco. Quell'affare è durissimo e si finisce sempre per premere troppo e perderne il controllo, facendo uscire davvero troppo prodotto (abbastanza per applicarlo sull'intero viso). 
Considerando che ne occorre davvero una quantità minuscola per coprire le occhiaie, è una nota davvero negativa.

 A parte questo dettaglio che spero MAC prenda in considerazione (visto che non sono l'unica persona che se ne lamenta), adoro questo correttore e ormai uso e userò soltanto lui. Nella foto più in alto, potete vedere quanto ne rimanga dopo 1 anno di uso quotidiano, dunque credo che sia decisamente un prodotto sul quale valga la pena investire.

Il correttore Pro Longwear di MAC costa € 19.10 (in Italia, ma i prezzi variano a seconda dei Paesi) in tutti i negozi e counter MAC delle vostre città o sul sito MAC cosmetics. 
 [giusto per farsi due conti, un correttore L'Oréal costa € 11, dunque se fate due calcoli conviene il MAC]


Have you tried this product? What do you think about it? 
Do you know anything else that is quite like it, but less expensive? 

Avete provato questo prodotto? Cosa ne pensate?
Conoscete qualcos'altro che sia uguale a questo, ma meno costoso? 

Tuesday, December 3, 2013

MAC Brush Cleanser review

There aren't many things to say about a brush cleanser: either it cleanse or not. 
The MAC brush cleanser is definitely one that does its job. I use it for quick rinses to my brushes, or for a more in-depth weekly cleaning, when I haven't been putting heavy make-up during the week. 
So why do I feel the need to review this item? Basically because I find that this is one of those products that is worth a splurge. 
Prior to the MAC brush cleanser, I had only tried the KIKO one, which is utter crap not an amazing product that retails for 6 € for 50 ml, while this costs 13 €  for 235 ml. If a quick maths game hasn't convinced you yet, just know that I have been having mine for 2 years now, and I've only recently hit half of the bottle. 
Do you get my drift now? 

Don't waste your money on something cheap, just because you think it is. Going for the cheap KIKO cleanser just means you will use more product each session, and will not achieve the same results. What's more you will need to buy the product more often. 
The MAC one offers good cleansing, you don't need much, and will have a lot more product in the packaging.

The only downside of this cleanser is the packaging that does not come with a spritzer. We don't care, though. There are loads of empty spritzer in stores now. 


Non ci son molte cose da dire su un detergente per pennelli: o pulisce o no. 
Il detergente di MAC è decisamente uno di quei prodotti che puliscono sul serio. Io lo uso per risciacqui veloci ai pennelli o per una pulizia settimanale più profonda, le volte in cui per tutta la settimana mi son truccata molto leggermente (sempre più spesso ora). 
E allora perché recensire un simile prodotto? Più che altro perché penso che sia una di quelle cose su cui vale spendere un pochino di più. 
Prima del detergente MAC ho provato solo quello KIKO, che è proprio una cagata un prodotto mediocre che costa 6 € e contiene 50 ml, mentre quello MAC ne costa 13 per 235 ml. Se il breve excursus nel mondo dell'aritmetica non vi ha convinte ancora, tenete in considerazione che io l'ho comprato 2 anni fa e che solo di recente ho raggiunto la metà della bottiglia.
Avete capito cosa voglio dire ora? 

Non sprecate i vostri soldi in qualcosa di economico solo perché pensate lo sia. Prendendo il detergente KIKO implicherà solo l'utilizzo di una maggiore quantità di prodotto ogni volta e non avrà comunque mai lo stesso risultato. Inoltre toccherà ricomprare il prodotto più spesso. 
Il detergente MAC pulisce bene, non occorre utilizzarne tanto, e in in termini quantitativi contiene molto più prodotto

L'unica nota negativa di questo detergente è la confezione, che non ha la pompetta spray. Ma noi ce ne freghiamo, visto che ormai vendono gli spruzzini vuoti. 


Have you ever tried the MAC cleanser or the KIKO one?
What is your favorite brush cleanser?

Avete mai provato il detergente per pennelli MAC o quello di KIKO?
Qual è il vostro detergente per pennelli preferito?

Friday, November 15, 2013

Ellis Faas Look #2 purple smokey eyes

 This is the look I wore to my friend's birthday party last night. I know, cellphone pictures...but I was in a rush (you know, work, zumba practice that makes you soak in sweat, getting ready and all that jazz). 
This was a super charged purple smokey eyes look, with an super beautiful bronze/gold inner corner. Again, I have used Ellis Faas eyeshadows for this, and I have charged the lower lashline a lot because of my eye shape. If I don't do this, my hooded eyelids becomes droopy, so yay for a charged lower lashline. 


Ecco il trucco che ho fatto ieri per la festa di compleanno della mia amica. Lo so, foto del cellulare, ma ero tanto di fretta (sapete...il lavoro, la zumba che ti fa sembrare un secchio di sudore ambulante, prepararsi ecc. ecc.). 
E' uno smokey viola molto carico, con l'angolo interno illuminato da un bel bronzo/oro. Anche per questo look ho usato gli ombretti Ellis Faas ed ho caricato molto la rima inferiore a causa della forma del mio occhio. Se voglio portare uno smokey sono praticamente obbligata, altrimenti da incavati, i miei occhi appaiono all'ingiù - anche se non lo sono. 


PRODUCTS USED

Ellis Faas E114 - Bordeaux Red
Ellis Faas E303 - Bronze
MAC Trax (transitioning from the bronze to the purple // transizione tra il bronzo e il viola) 
Illamasqua Vernau (above the crease, softening the blend // poco sopra la piega, per sfumare)
MAC Honey Lust + Illamasqua Stealth (brow bone)
Soap & Glory Archery eyebrow marker & pencil
Bourjois Volume Glamour Max mascara

Hope you enjoyed it. Have a nice weekend

Spero vi sia piaciuto. Buon weekend.

Thursday, November 14, 2013

Ellis Faas Look #1

If you follow me from quite some time now, you know I love Ellis Faas. Her imagery is pure art, her products are simply beautiful. The whole concept, I find beautiful. I've been using Ellis Faas eyeshadows and lipsticks for years, and I've always said that despite the proposterous price, I'll buy her lipsticks again in the future. 
Yeah, right: her lipsticks. Not the eyeshadows, I hear you say? No. Not unless they change the packaging. The product itself is awesome. Seriously, it is the best cream eyeshadow I've ever tried in my whole life. But, damn it, the stuff costs 26 € and the mechanism on the bullet is hell. It takes ages before it comes out of the tube, and most of the times, if you don't use the eyeshadows everyday, the product dries in the hole and obstructs it. When you screw the mechanism, the pressure is so much, the whole brush falls apart from the rest of the bullet. What the heck! You never manage to put it back properly, and the product inside just dries. For 26 freaking euros, I want more. I'd say the packaging is not appropriate to the content there, because I have never had the same problem with the lipsticks, and I'm sure as hell that doesn't happen with their foundation or concealer. 

Anyway, I've recently decided to do my eyes make-up only with Ellis Faas products, so that I don't put them to waste, so expect more of these soon. You will see, the product itself is amazing, and I love it. So, this is the first look. 
Enjoy. 


Se mi seguite da un po' di tempo, sapete già che adoro Ellis Faas. Le immagini promozionali sono semplicemente belle. Il concetto della marca mi piace. Uso gli ombretti e i rossetti Ellis Faas da un po' di anni, e nonostante i prezzi improponibili, ricomprerò sicuramente i rossetti in futuro (tipo auto-regalo natalizio ogni anno quando avrò un lavoro decente)
Sì, i rossetti. Non gli ombretti, vi sento già dire? No. Non prima che abbiano cambiato il pack. Vedete, il prodotto in sé è fantastico. Davvero, è il miglior tipo di ombretto in crema che abbia mai provato. Ma, cribbio, costa 26 € e il meccanismo è infernale. Ci vogliono due ore prima che esca fuori il prodotto...ogni volta che lo uso. La maggior parte delle volte, se l'ombretto non viene usato ogni giorno, il prodotto si secca nel buchino e lo ostruisce. Poi quando si va ad avvitare il meccanismo, la pressione è così tanta che la parte dove c'è il pennello salta via. E che cavolo! Non si riesce manco a rimetterlo a posto per bene, e quindi il resto del prodotto si secca. Per 26 astronomici euoro, pretendo di più. Direi che stavolta il packaging non va bene con il prodotto, perché lo stesso problema io non l'ho mai avuto coi rossetti, e sono sicura al 100% che non accada coi fondotinta e i correttori.

Comunque, di recente mi sono imposta di truccarmi gli occhi solo con i prodotti Ellis Faas, in modo da non sprecarli, quindi aspettatevi numerosi post come questo. Vedrete, il prodotto in sé è davvero fantastico, io lo adoro. 
Dunque, questo è il primo look. Spero vi piaccia.

Sorry, I'm letting my eyebrows grow and I wear no foundation // Scusatemi, ma sto facendo ricrescere le sopracciglia e non porto fondotinta qui


PRODUCTS USED

ELLIS FAAS Creamy Eyes E119 Yellow Ochre 
ELLIS FAAS Creamy Eyes E203 (discontinued)
ELLIS FAAS Creamy Eyes E114 Bordeaux Red (it is more of a deep purple)
Bourjois Volume Glamour Max Mascara
MAC Brow Gel in Beguille

No brushes// non ho usato nessun pennello


Have you ever tried Ellis Faas products? 
What do you think of the bullets?

Avete mai provato i prodotti Ellis Faas? 
Cosa ne pensate delle loro confezioni?

Monday, November 11, 2013

MAC Pigments Swatches Gallery

Ever since I've started blogging and discovered the joys of recognizing textures, pigmentation, and brands that produce good quality eyeshadows, I kind of have stopped using pigments. 
That was, until my friend Paola (you can find her at the Facebook page The most beautiful Makeup is Confidence) has kindly gifted me with some little jars of MAC pigments
Wanna know what pigments I've chosen? Keep reading, and mind that this post is pictures heavy!


Da quando ho creato questo blog ed ho scoperto la gioia del riconoscere textures, pigmentazione, e anche i nomi dei brand che producono ombretti di qualità, ho un po' accantonato l'utilizzo dei pigmenti in polvere libera. 
Questo finché la mia amica Paola (potete trovarla, se già non la conoscete, alla pagina Facebook The most beautiful Makeup is Confidence) mi ha gentilmente regalato delle piccole jar con dei pigmenti MAC
Volete vedere dov'è ricaduta la mia scelta? Continuate a leggere. Vi avverto, però, che questo post è un po' pesantuccio a causa delle foto.


 Vanilla. This is the one pigment I will repurchase. A cream color with gold reflex in it. Sometimes, the way the light hit it, it seems to have some pink flex in it too. The perfect highlighter. You can't beat it. It's great. 

Vanilla. E' il pigmento che ricomprerò. Un color crema con riflessi dorati. A seconda di come viene colpito dalla luce sembra avere anche delle particelle rosa. L'illuminante perfetto. Imbattibile. E' davvero splendido.


Gold Dusk. As the name suggest, a very light gold, the kind of yellow you can see at sunset. This works really well as an inner corner highlighter with MAC Club eyeshadow (you can see it here). 

Gold Dusk. Come suggerisce il nome, è un color oro molto chiaro, il tipico giallo che si può vedere al momento del tramonto. E' molto carino usato come punto luce nell'angolo interno dell'occhio se decidete di usare Club, sempre di MAC (come potete vedere qui). 


Jardin Aires. A peachy champagne color. Very neutral and great paired with just some mascara and red lips.

Jardin Aires. Color champagne che vira un po' al pesca. Molto neutro e bellissimo abbinato solo al mascara e ad un bel rossetto rosso.


Melon. This is one of their most famous pigments. It looks peachy gold from some angles, pure gold from others. Great in the summer, and also for when you haven't got much sleep at night, because it immediately perks up the eyes.

Melon. Uno dei pigmenti più famosi. Sotto alcune luci sembra un'oro pesca, sotto altre oro puro. E' meraviglioso per l'estate, o per quando si hanno gli occhi stanchi dal poco sonno perché  li ravviva molto. 

Swatcharama: Vanilla, Gold Dusk, Jardin Aires, Melon. First row: used with a brush (con pennello), Second Row: pressed with fingers (con dita), Third Row: brush + MAC Fix+ (pennello + MAC Fix+)


Sunny Daze. A lovely pewter shade. Very peculiar, and I think it looks great with some black eyeliner heavily smudged or with some brown in the outer corner.

Sunny Daze. Ha il colore del peltro, quel metallo che pare grigio, ma ha anche qualche riflesso un po' più caldo in sé (contiene una percentuale di ottone, se non sbaglio). Particolare e secondo me sta bene con un po' di matita nera o eyeliner nero sfumato, oppure con un po' di color marrone nell'angolo esterno. 

Sunny Daze L-R: finger, brush, brush + MAC Fix+ // dito, pennello, pennello + MAC Fix+


Rush Metal. This was a limited edition and part of the Rush Metal collection. The texture is weird. The powder has big chunks in it, which results in kind of glitters and major fallout. The only way I use this pigment is with MAC Fix+. Too bad, it is a great copper shade. 

Rush Metal. Era un'edizione limitata facente parte della collezione Rush Metal. La texture è strana. E' una polvere tagliata grossolanamente, ha un effetto tipo glitter e cade un po' ovunque. L'unico modo in cui riesco a portarlo è col pennello bagnato di MAC Fix+. Peccato, è un bel color rame. 
 
Rush Metal L-R: finger, brush, brush + MAC Fix+ (dito, pennello, pennello + MAC Fix+)


Rose Gold. I have no idea why this is called Rose Gold. It has no rose in it, just gold. I would say it is more of a bronze gold. The powder is so finely milled this has great payoff with a dry brush as well. It looks perfect, much like a pressed powder eyeshadow, and one of the best quality. Metallic finish. Lovely for those JLo inspired looks. 

Rose Gold. Anche questa, se non erro, era una collezione limitata. Non so perché lo abbiano chiamato Rose Gold. Di rosa ne ha ben poco. Direi, in effetti, che è un oro/bronzo. La polvere è così fine che la scrivenza è ottima anche a pennello asciutto. E' perfetto, come un ombretto in polvere pressata di ottima qualità. Finish metallizzato. Perfetto per i look alla JLo. 

Rose Gold L-R: finger, brush, brush + MAC Fix+ (dito, pennello, pennello + MAC Fix+)


Burnt Burgundy. It is more or less a mat, pigment version of MAC Sketch. I had never seen a mat pigment before. Peculiar, but you can skip it if you have Sketch.  With a brush soaked in MAC Fix+ it becomes awesome! Looks great with gold eyeshadows and with dark blues too. 

Burnt Burgundy. Una specie di versione più opaca e in pigmento dell'ombretto MAC Sketch. Non avevo mai visto un pigmento mat. Particolare, ma potete anche tralasciarlo se già avete Sketch. Con un pennello imbevuto di MAC Fix+ diventa bellissimo! Ed è molto bello con gli ombretti dorati e con i blu scuri. 

Burnt Burgundy L-R: finger, brush, brush + MAC Fix+ (dito, pennello, pennello + Mac Fix+)

That's all, folks. I hope this was useful to you.
Do you have some MAC pigments? What are your favorites?
Questo è quanto. Spero che la galleria vi sia stata utile.
E voi, avete dei pigmenti MAC? Quali sono i vostri preferiti?